You are currently browsing the tag archive for the ‘Homebrew’ tag.
This actually happened last week but let’s pretend I just finished. I don’t think anybody likes to bottle beer. Breweries enlist help of fans and enthusiasts(or unlucky interns) on their bottling days, people develop intricate keg systems to avoid it, heck I think it’s about as unglamorous and labor intensive as it gets. While making the beer you feel part mad scientist, part bootlegger, taking into your own hands a several thousand year old tradition forever changed by companies like Budweiser and Miller. It’s exciting and requires a good bit of patience letting your yeast flocculate and do other kinds of fun fermentation specific verbs that could be confused with deadly disease specific verbs if you didn’t know any better (or wanted to spook a friend). Yet 2 weeks after your own home brew first entered it’s primary fermentation bucket, the activity has stopped, the yeast has attenuated, and the beer is now alcoholic and flat. It’s time to bottle.
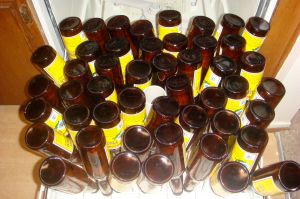
Round 1
I procured 4 empty 12 packs of Pacifico from our dog groomer Robin, who somehow managed to provide them to me in about 2 days notice. On bottling day these went through the dishwasher two times, through a bucket of bleach water once, and then finally through the Iodophor to make sure that they were 100% clean and sterile. It’s a bit daunting any time you’re handling home brew as it takes a lot of prep work and cleaning just to make sure the beer doesn’t end up funky or off tasting. Imagine 3 weeks of waiting, shortcutting while bottling, and now the batch tastes like the way durian smells….that’s a nightmare. So I was beyond anal making sure everything was clean and sterile, even running my siphon with sanitizer to get it started before draining the sanitizer, pinching the end and moving the whole set up to the bottling bucket. A drop or two might have found it’s way in the beer but it’s better than tap water.
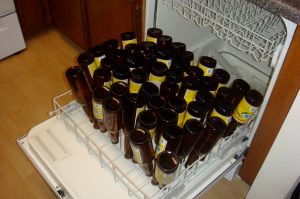
Round 2
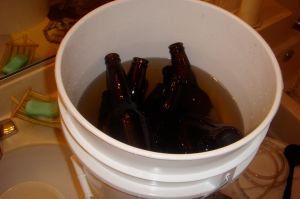
Dunk and soak in sanitizer
A note on siphoning: Siphoning allows the transfer of beer from the fermenter, which now has a big cake of yeast and protein on the bottom, to the bottling bucket, without disturbing said yeast cake. Carefully siphoning allows cleaner bottles that can be enjoyed without floating bits in them. It’s a pain in the ass. I highly recommend looking at this Youtube Video to really see how it’s supposed to be done. I literally practiced for 45 minutes before the aha moment came and I had it down.
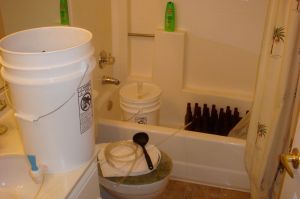
Ready to siphon
Once the beer is in the bottling bucket, the bottles are clean, the caps are clean….EVERYTHING is clean, I set up a little assembly station to try and be as efficient as possible. The more I research and get into home brew the more I realize that part of the fun is setting up. The differences between a hardcore home brewer and a commercial brewery are essentially size and yeast, not much else. It took me maybe an hour to work my way through the bucket, Margaret would have helped had I Love Money 2 not been on but she was pretty interested in finding out more about whatever STD the contestants were spreading around that episode. If VH1 ever drops that show it could easily be repackaged and shown to elementary school kids about why you want to not drop out of school. Seriously, somebody quarantine the cast.
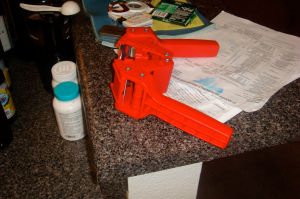
The Device
The bottles are capped one by one with the help of a winged bottle capper. It’s pretty easy and once I was over the fear of an exploding bottle of beer launching glass shards and toxic juice all over myself I moved through them batch quickly. The capper has a magnet in the center which makes placing the caps on the bottles easy and requires a bit of force to secure the cap. The end result? Well…a capped bottle, as expected. Somehow capping the bottles, not making the beer, seemed like the most amazing part to most of my friends. I guess they assumed we were going to hang out in my bathroom and sip moonshine out of the tub. They’ll be pleasantly surprised.
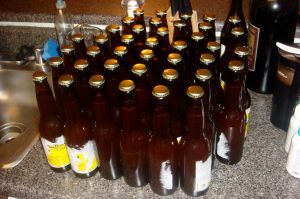
Name TBD
Margaret is officially done with school today and her graduation is a week from Saturday. I have 7 of her relatives coming to stay with us for a week starting on Wednesday. In our apartment. Which is a 2 bedroom. Which is 1100 sq ft. Including a baby. They don’t believe in hotel rooms. *Silence*
The beer will be finished Tuesday, the day before they come. Thank god because if it’s bad I can pass it all off to them and drain through the batch quickly so I can start another one. If it’s good on the other hand I have some assistance in dealing with no personal space and privacy for a week.
Beer names. Margaret’s choice: Gangster Bitch Batch 1, named in honor of the dog. Zach’s choice: Endurance Ale or Sanity Keeper in hopes of alchemical properties imparted by drinking it.
I’m a very DIY cook. Complicated processes fascinate me and I enjoy working my way through projects and seeing improvement as I go. I’ve been baking bread weekly and experimenting with chilling (retarding) the dough at different points during the process trying to gauge how it affects the end result. In a perfect world I’d have time to do the whole thing in one shot but that’s never the case. Often the idea of a fresh chunk of bread with a wedge of cheese and a nice hoppy beer takes over, and being that the fridge is stocked full of good cheese and some nice hoppy beer…only one thing was missing. I wanted to make something hearty and round, rustic. The Bread Bible has a recipe for a basic hearth bread made with whole wheat which fit my bill perfectly. We bought a great cheese called Beemster which is an aged gouda that has become very caramelly without taking on that soap taste that gouda can get. It also has little crunchy crystals in it and is awesome with sharp hoppiness.
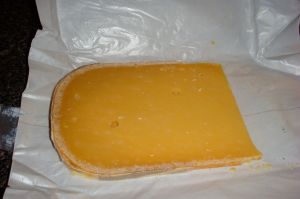
Beemster
I swear I’m psychic sometimes as I put together a starter the night before with wheat and bread flour. The next day it had tripled and looked ready for some action. The dough is quickly mixed together and rested during a process called autolyse. By allowing the flour in the dough to absorb the moisture before salt is added the overall time needed to knead is greatly reduced. After autolyse the dough is mixed hard with salt and my dough hook just beats the shit out of it. I really have to be careful during this as my KitchenAid could walk itself right off the counter.
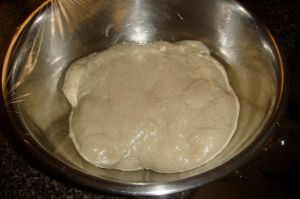
Just mixed
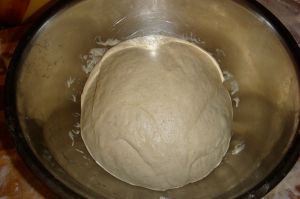
Nice and tight to get the air in
One of the new methods I tried this time is called a turn. The dough rises and is stretched and folded on itself to create air pockets and a more tender crumb. Easy enough and seemed to work out for me. I knew I would have to slash the dough before I baked it which I figured would be a disaster and it was. My pseudo starfish is a good example of me making things too hard. Next time I’ll just stick with a cross like the rest of the novice bakers on the planet.
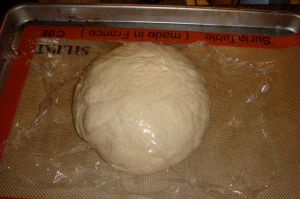
shaped and rising, not a perfect boule but improving
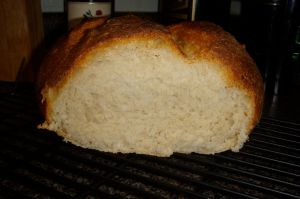
The bread ended up delicious with a very crackly satisfying crust, a nice success indeed. Tuesday I move on to bottling my beer which is going to be a post on itself with lots of update pictures. Mary from Taste sent me a note that her Belgian Ale is bottled and ready to drink so I better hurry the heck up so we can swap and compare. I’m expecting a disaster but a motivating one if anything. Beer and bread making are good exercises in self control and patience. Both take prep work, planning, notes, and a willingness to completely fuck up after hours of waiting unable to fix any mistakes you’ve done. While it can be hard at first seeing progress is super rewarding and enriching.

Bad slashing
Finally I’ve been exposed to a few young business owners this week which I’ve taken as a sign of good things to come. Margaret also has a potential job at El Dorado which seems like a very cool hipster hang out complete with cans of PBR and trilbies everywhere. There Flikr has a lot of cool picture so let’s keep our fingers crossed it works out. Cheers
I’ve been very interested in the craft of home brewing lately and decided to give it a few tries and see what happens. I picked up a starter kit from Home Brew Mart, spent some time reading about the process on the Internet and drank for practice. I felt pretty confident, cocky almost, about how good this beer was going to be. I read all the pitfalls to watch for, the little techniques that separated a good beer from a very good beer and created a subtle plan to stick to the basics but go the extra mile when possible….well, we gave it a shot.

Dry Malt Extract
The story starts with me purchasing an aluminum 32 quart stock pot from Chef City, I found out later that most brewers vehemently discourage brewing in aluminum cookware. Ever the optimist I boiled about 4 gallons of water which proceeded to strip the inside of my pot and leave a perfectly defined divide of aluminum above the water line and copper penny color underneath. Ew. There was also an omnipresent black residue that found its way onto every paper towel I touched to any surface on the pot. Simply, it had to go…fast. 24 hours, several threats, some hard negotiating, and a 22oz Sculpin later, I was the proud new owner of a 16 quart stainless steel stock pot, a much better, though smaller, brew pot.

First Addition of DME
I used the basic recipe from Home Brew Mart for a West Coast Pale Ale:
3 lbs Pale Malt Extract
3 lbs Amber Malt Extract
2oz Amarillo Hops (1.5oz for 60 min, .5 at knockout)

Mise en Place
Seemed simple enough with just 3 ingredients and while I knew that without some specialty grains and more hops it wouldn’t really be more than a first attempt, brewing is a learning process at first just like cooking. While the wort (bubbling brew) was boiling I sanitized everything for the eventual transfer to the fermenter. Everything looking ok. I practiced siphoning water from one bowl to another with very limited success. It’s a hard and awkward move and I can see why inventing in an autosiphon can prove invaluable. At least I feel confident that with some tubing and a bottle of water I could steal a tank of gas in a pinch….#useless life skills. My practice was interrupted when I smelled burning sugar which was the inevitable boil-over I’d been warned to watch for 100x. While cleaning said boilover, there was a 2nd boilover (also warned against), which set off a string of cussing that lasted for about 15 minutes.

Fuck you boilover
I cleaned the stove as best I could and just watched the wort carefully for the last 10 minutes before transferring my pot to the sink and immersing it in an ice bath to cool the almost beer down. Of course I didn’t buy a bag of ice so the super hot 3 gallons of liquid in a stainless steel pot melted the ice almost immediately. After that it was near impossible to get the beer cool enough. It was recommended that I take it to about 60F before doing anything, we made it to about 85F and had to transfer…it’d been a while. My siphoning still needs work and I couldn’t for the life of me get a good suction so I ended up just pouring the beer carefully into my bucket where it was aerated and yeastificated. The OG of my beer is 1.049 which is going to end up being about a 5.2% beer, pretty mellow.

Melting my ice
It’s been about 3 days now since our brewday and the fermenter is still slowly bubbling away. In another 5 days or so I’m going to siphon the beer to a second container to settle for about 2 weeks before I proceed to bottling.
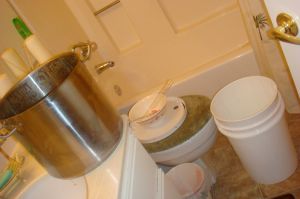
Pre-Siphon Fail
Some Mistakes I Made That I Knew Better On:
1) Watch the wort towards the end for boilover
2)Buy a bag of ice to cool the beer down as fast as possible
3)Don’t get impatient and pitch your yeast at 85F, wait until 60F
4)Buy an autosiphon

Gurgle
