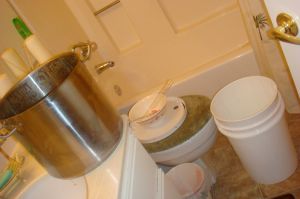
I’ve been very interested in the craft of home brewing lately and decided to give it a few tries and see what happens. I picked up a starter kit from Home Brew Mart, spent some time reading about the process on the Internet and drank for practice. I felt pretty confident, cocky almost, about how good this beer was going to be. I read all the pitfalls to watch for, the little techniques that separated a good beer from a very good beer and created a subtle plan to stick to the basics but go the extra mile when possible….well, we gave it a shot.

Dry Malt Extract
The story starts with me purchasing an aluminum 32 quart stock pot from Chef City, I found out later that most brewers vehemently discourage brewing in aluminum cookware. Ever the optimist I boiled about 4 gallons of water which proceeded to strip the inside of my pot and leave a perfectly defined divide of aluminum above the water line and copper penny color underneath. Ew. There was also an omnipresent black residue that found its way onto every paper towel I touched to any surface on the pot. Simply, it had to go…fast. 24 hours, several threats, some hard negotiating, and a 22oz Sculpin later, I was the proud new owner of a 16 quart stainless steel stock pot, a much better, though smaller, brew pot.

First Addition of DME
I used the basic recipe from Home Brew Mart for a West Coast Pale Ale:
3 lbs Pale Malt Extract
3 lbs Amber Malt Extract
2oz Amarillo Hops (1.5oz for 60 min, .5 at knockout)

Mise en Place
Seemed simple enough with just 3 ingredients and while I knew that without some specialty grains and more hops it wouldn’t really be more than a first attempt, brewing is a learning process at first just like cooking. While the wort (bubbling brew) was boiling I sanitized everything for the eventual transfer to the fermenter. Everything looking ok. I practiced siphoning water from one bowl to another with very limited success. It’s a hard and awkward move and I can see why inventing in an autosiphon can prove invaluable. At least I feel confident that with some tubing and a bottle of water I could steal a tank of gas in a pinch….#useless life skills. My practice was interrupted when I smelled burning sugar which was the inevitable boil-over I’d been warned to watch for 100x. While cleaning said boilover, there was a 2nd boilover (also warned against), which set off a string of cussing that lasted for about 15 minutes.

Fuck you boilover
I cleaned the stove as best I could and just watched the wort carefully for the last 10 minutes before transferring my pot to the sink and immersing it in an ice bath to cool the almost beer down. Of course I didn’t buy a bag of ice so the super hot 3 gallons of liquid in a stainless steel pot melted the ice almost immediately. After that it was near impossible to get the beer cool enough. It was recommended that I take it to about 60F before doing anything, we made it to about 85F and had to transfer…it’d been a while. My siphoning still needs work and I couldn’t for the life of me get a good suction so I ended up just pouring the beer carefully into my bucket where it was aerated and yeastificated. The OG of my beer is 1.049 which is going to end up being about a 5.2% beer, pretty mellow.

Melting my ice
It’s been about 3 days now since our brewday and the fermenter is still slowly bubbling away. In another 5 days or so I’m going to siphon the beer to a second container to settle for about 2 weeks before I proceed to bottling.

Pre-Siphon Fail
Some Mistakes I Made That I Knew Better On:
1) Watch the wort towards the end for boilover
2)Buy a bag of ice to cool the beer down as fast as possible
3)Don’t get impatient and pitch your yeast at 85F, wait until 60F
4)Buy an autosiphon

Gurgle

Leave a comment
Comments feed for this article